Dive Deep into Creativity: Your Ultimate Tumblr Experience Awaits
Packaging - Blog Posts
guy who does unboxing videos but he only talks about the boxes


Meow Box – Packaging Design of a Box for Cats full of Cat Stuff.
About: We are a fun young company based out of Vancouver BC Canada. We love cats, cats love us, humans love their cats, and we have this fabulous little box that fits just right with people like us.
The only way to do yoga!

(via Interactive Cheerios by Jae Salavarrieta)


Pet Love - Dog Food (Bag, Box and Tin)
Hello everybody! How have you been this weekend? Well today I bring you a picture of some dog food packaging that you make in the last year. I hope you like it. ♡
What it says in the description of the package is that it is food for puppies and that it is for medium and large breeds.


Packagings
Hello everyone, remember I told you that I was going to post some of the things I have been doing for my clases, well here is the first picture this are some packaging they could be for candies whatever you want actually. This are some modules, we first made them in black and white, we put them color and chose 3 of the modules for this packagings. So what do you think about them?
Don´t forget to leave a ♡ pls.!!!
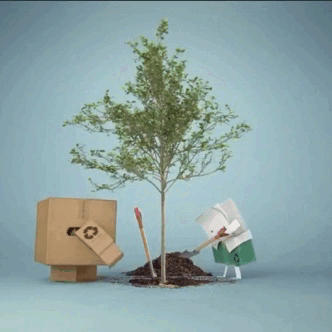
In honor of Arbor Day!

Take a look at this rare glass defect that our QC folks caught on the bottling line! It's a washer from the forge imbedded in the bottle wall. Normally, the difference in thermal expansion coefficients between the metal and glass would cause the bottle to weaken and break as it cooled. That it survived and was filled is astounding. #foodscience #enology #wineindustry #packaging #glassblowing #latergram #thermodynamics #allthewine

Hong Kong Taxi
www.claireobrienillustration.com


THE ROBOTO :: VINTAGE PACKAGING
:: PERSONAL WORKS ::

DOT packaging - 2018 / Atelier Lomann
> https://lab.atelier-lomann.ch
> @ atelierlomann

DAY THIRTEEN - BLOG POST #15

So there we have it, the last day of class and our final submission was due. I’ve pasted in a photo to give you guys a little look-see of how it turned out. As you can see, it really evolved from the initial concept to the final design. I know I say it constantly, but you need to ‘Kill Your Darlings’.
I don’t think I could have gotten to my final design if I wasn’t willing to flex on what I was doing and I’m really happy with how it turned out. I’ve learned to let go of my initial vibrant idea during my time in this class and I think I’ve learned that just because my initial concept works, it doesn’t mean it’s the only concept that does.
Due to printing, my design shifted a little on the page and cutting it became an issue. I didn’t get as clean a prototype as I would have liked as a result, but I’m happy enough with the results! We went from a complicated little box with a pour spout to as little paper as I could manage and I think that I accomplished the goals of this project in that sense.
I loved working with a real-life client and while my design was not chosen, she told me that she really liked it, so I feel happy about that.
DAY TWELVE - BLOG POST #14

Bet you weren’t expecting this!
I know that last week I was pretty hung up on my box with the spout idea, but after taking a look at the notes I’d taken at our first meeting with our client, I realized that one of the things she’d said was a dream package for her, was a package with as little packaging as possible.
This is still a little bit indulgent by having the paper wrap, but I don’t think I went overboard. The wrap is one piece of paper that wraps around the granola, which helps it stand up on the shelf and also gives the granola a handy little carrier handle for those juiced up yogi’s on the go! I think the design is playful enough that it looks cute but can also appeal to all genders.
After talking to the client today though, I found out that I’d accidentally designed my package.....for ants! This package needs to be at least 1.5x the size for the amount of granola that needs to fit. This isn’t a bad thing though, that will allow me to make my font bigger and give me more room to play as well. I’m excited to plan this out again!
Things to note:
Add ‘crunchy’, ‘raw’ and ‘dehydrated’ to the front.
‘Not Your Average Granola’ or ‘Superfood Granola’
3 flavours based on juices
supergreens -> green
ladyluxe -> pink
nut milk -> milk chocolate -> tan/bran/bronze/compliments chocolate (quick fix bottle colour to light tan)
That’s all for now!
DAY ELEVEN - BLOG POST #13
Today we met with our client for the first time since our initial meeting two weeks ago! We also had a visit from Gord Wright, a Hemlock Printer rep. He had a lot to tell us about the printing process and he was very informative.
With that though, I realized that the seed paper that I was so attached to might not be the right way to go. The problem with seed paper is how moisture effects it. Grocery stores and the Goodlife Juice store may not be a great environment moisture-wise for that. Then, there’s also the seeds that are used and whether or not they are native to BC. If the seed in the paper is an invasive species, that would not be great for our environment.
Oh well, kill your darlings.

My client liked the box with the pour spout best out of the ideas I showed her but then we realized that the granola will probably be packaged inside a plastic bag inside the box to keep it dry. I’m wondering if I can come up with a solution for this, like a tearaway that’s attached to the bag and box so that when you pull the spout out, the bag is torn open. I’m not sure how this will work, but I’d like to give it a try.
If that doesn’t work, I’m also thinking of just cutting a corner of the top of the box out so that when it’s on the shelf, the bag can be seen. The user can then just tear the bag open without even having to open the box and reseal it with a clip.
I guess I’ll have to try both of these things.
DAY TEN - BLOG POST #12
The aim for this stretch of the project was to create thumbs, mapped layouts and sketch model mockups. It’s hard however to get the appropriate size when you don’t really know how much space 250 grams of Good Life Granola is going to take up.
Now, something I was told to work on was my ideation component so I worked really hard to come up with at least 50 thumbs to work with. I’m not the type to put myself into a box (*bdm tss*) so I found that just letting my pencil take up the space it wanted was the best way to go for me. This created a bit of a flow of ideas rather than me just trying to fill little squares with thoughts. Sometimes, you need to think outside of the box. (*bdmmmm tsssss*)
Here are the ideas I came up with.

I wanted to make sure that I worked through as many shapes as I possibly could think of to be thorough about the ideation period. Although I came up with some really fun, crazy shape ideas, I found myself drawn to a simple box for ease of production and cost when it came to the packaging and decided to develop those concepts further.

After fleshing those out a bit more, I decided to just sit down and have fun. I forgot how much I loved this part of the ideation and creation period. Although I messed up a couple of times, I didn’t let that frustrated me and instead just enjoyed the tactile puzzle I was dealing with.
These are the design solutions I have come up with thus far:

I can’t wait to get proper measurements down so that I have a better idea of what I’m working with. I’m not even sure at all which one I like best so far, although I can tell you that the most interesting one to try and create was definitely the rectangle with the pour spout! (I thought my brain was combusting a little bit as I tried to visualize what I had to do in my head.)
Day Nine - Blog Post #11

Project 2 Creative Brief: Granola Package Design for Good Life Juice
Objectives
My goal is to create a sustainable series of packages for Good Life Juice’s new Granola line that stays true to the brand while being economically responsible for the producer (production costs and impact) and the environment. It should reflect Good Life Juice’s brand while being design smart. By that I mean that the design should be lasting and not follow trends, it should be something that my client can use for many years. I want to make something that will appeal to both men and women because my client said that 80% of her current clientele is female. Interestingly, 75% of her workforce is also female and that is something I want to showcase with the packaging as well.
The goal isn’t to scare men away from it though. So we’re looking for something more in the middle. My client also specified that she would like the packaging to be ‘classy, beautiful and femme’.
I already know that I want to make something super environmentally friendly that will match the way Good Life presents itself and strives to be. I found a Canadian Website that prints on seed paper and that’s a route I would really like to go down.
I also want to focus on the life cycle of the granola and the juice pulp involved in it. From start to finish, this granola is environmentally involved and I think this story is important. My client also mentioned that if my package contains plastic, she would like instructions for the user on how to recycle the plastic so that it is eco-responsible as a package and I think that’s really something I’d like to include if I go that route.
Audience
My client is expecting a wider range audience than she usually gets for her juices so I’m going to say that my audience ranges from the late twenties to people in their mid-sixties who are focused on their health and do not mind spending a little bit more on their granola! I have my parents as the perfect test audience as they are both on a health kick right now and have started to take an interest in good design because of my field of study.
In my head, I have three basic users I want to design for. Here is a quick set of notes on each:
Karen Whitmarsh - 28
Interests include maintaining mental and physical health through juice cleanses, yoga and daily exercise. She shops at Whole Foods because she likes buying locally and organic. She’s on the market for a new granola and already drink Good Life Juice. She’s considered GLJ’s granola before but has yet to buy it because the package underwhelms her in comparison to some of the other more sustainable packaging found at Whole Foods.
Jordan Bickeridge - 35
Jordan spent most of his twenties binge drinking at parties, smoking cigarettes and not really worrying about his health and now regrets it. He is brand new to the world of health foods and just wants to buy a granola that will be healthy for him and is worth his money. He wants to go into the granola/cereal aisle at Whole Foods and just grab a package probably based on what it says.
Elia Yang - 62
Elia has been eating raw and organic for the last five years and has finally gotten her wife on board with her. The two of them love drinking smoothies in the morning and are now looking for a filling snack that also satisfies their sweet tooth. They read online that granola was a great thing to just toss in their purse. Both of them love pretty packaging but hate waste and will likely buy packaging that appeals to them environmentally as well as aesthetically.
As you can see, this is a pretty wide range but that was the vibe I got from our client meeting today. I think it will be a fun challenge to meet these audience expectations.
Desired Response
I feel happy buying this granola because I know that it is eco-friendly and has the ingredients I want from it to make me feel healthy and whole.
Creative Considerations
This is NOT Mom n’ Pop’s granola. The packaging must be beautiful, high-end and gorgeous.
My client wants to be transparent with her customers, she hates it when packages say things like ‘all-natural’ and hates pushy packages.
HAS TO BE CLASSY.
No trends, no geometry, chevrons or primary colours as per my client’s taste.
Must be careful of food packaging regulations to Canada standards.
The packaging must have the essence of the Good Life Juice brand.
I can’t go overboard with materials, it needs to be affordable for my client.
The package should be sustainable but not look ‘hokey’.
Day Eight - Blog Post #10
Coombs Country Market Field Trip
We went on a field trip to Coombs today to visit their grocery store. Coombs has a lot of really neat packages in their store because they sell items that come from all over the world! There were beautiful Balsamic bottles, chocolate bars, yoghurt packages and so much more! However, we were there with a simple enough goal and I wasn’t to get distracted, although in the end, it happened. We can blame the edible glitter and handmade paper for that!
Anyway, the goal was to find two sets of a package series that we could draw inspiration from and use as an example for our next project. We’re supposed to design a box for Granola for this delicious, local-based fresh juice company.
Series #1: Fee Brothers Bitters

How is the branding consistent across all of the packages?
While the brand’s colour changes, the layout of the packages remains consistent. The type, logo, paper and sticker along the top are all the same. The only thing that changes in fact, is the colour. Even then, the colours are in the same tones. Even with just a quick glance at the shelf, someone could register that they’re a series.
How does the design differentiate amongst “flavours”?
The design does not differ much, the only thing I did find is that on some of the bottles, the lid had a different colour to denote flavour as well. However, this wasn’t completely consistent so it was hard to say what it meant completely, which was a small issue in the concept overall.
What is the brand concept?
The concept for this brand seems to be higher end and meant to make the audience feel like it is an old-fashioned product. It is wrapped in paper to give it this illusion of being vintage and the sticker that runs around the top displays the portraits of what one must assume are the Fee Brothers. What’s fun about is that you can’t see the liquid inside until you open and unwrap the bottle, giving it the feeling of something you might be able to present as a gift.
Other thoughts?
I’m kind of curious to see what the bottle looks like underneath the paper and was seriously considering buying a bottle just to check. It’d be cool if this product was so easily recycled by just removing the label and bringing the glass in! While I want to create something consistent, I also want to make sure that I focus on the environment. I’m already thinking about what I might do to make the package sustainable and within my client’s budget. I like the idea of glass.
Series #2: Whittaker’s Chocolate.

How is the branding consistent across all of the packages?
Whittakers is a really neat brand because while there are a lot of flavours, the Whittakers chocolate brand is unmistakable. I first came across it in New Zealand, where it is manufactured and proudly second only after Cadbury chocolate. Every single package is a beautiful shade of gold in a paper wrap and when opened, another foil wrap of gold protects the chocolate inside. The branding remains consistent by keeping the logo at the top of the package, followed by the chocolate information and name.
How does the design differentiate amongst “flavours”?
There is always a block of chocolate at the bottom but it is always illustrated with the correct flavour profile per package. Each flavour also has a unique font colour. Otherwise, the rest of the package remains the same.
What is the brand concept?
The concept for the brand is definitely meant to be luxurious, denoted by the gold wrap colour. The font tells us that it is also meant to be old-fashioned. Knowing New Zealand, I know how proud they are of their heritage and this chocolate is meant to draw on that. The user should feel that when they are picking up this block at the grocery store, they feel like they’re in a lovely old candy shop.
Other thoughts?
I was wondering if I was drawn to this series because of the nostalgia I felt when looking at it, you can’t count on one hand the amount of these bars I got through when I lived there! However, you can tell just by the image that this is a really strong series. There is no question that they are linked and I think the key to that is only changing a small part of the package to reflect the different flavours. The goal is definitely to have the user know without question that the two separate items that they are holding are linked.
PROJECT ONE RATIONALE - BLOG POST #9

Project 1 - Environmental Redesign Rationale
ARTG371 - Sara Holmes
Product: Tsubazo Pairing Knife

Project Description: For this project, the goal was to find an overly packaged item and redesign it to create something more environmentally friendly. We were allowed to choose anything we deemed to be overpackaged, even if the packaging seemed alright. My goal was to create a package that could be used again, either as individual components or as one piece. I wanted to make sure that any waste from the project was one hundred percent recyclable. I also wanted to create a package that turned a simple pairing knife into a beautiful gift to be opened.
Environmental Considerations: When walking down the aisle of any store, it is unlikely that you will see more than a couple of packages with no plastic involved. Since the invention of plastic, it has been involved in packaging whether that has been as a plastic sleeve, bubble wrap, slips of plastic, etc. Even if it is made reusable (hard plastic), most of it ends up at the dump where it will take hundreds of years to break down completely.
I wanted to create a simple enough package that could be completely reused, and if the person has no interest in reusing it, it could decompose naturally. For this project, I used the following:
Scrap Wood - 13 years to decompose.
Wood Glue - 1-3 years. Breaks down over a period of time when exposed to moisture.
Cloth - 1-5 months to decompose.
Thread - 3-4 months to decompose.
Tracing paper - 1-4 weeks to decompose, could also be reused to wrap a gift, jot down notes, or even as tracing paper!
Recycled paper - 2-6 weeks to decompose.
While a bit more effort is put into the packaging because of this, my audience could comfortably buy this product without worry of what to do with the package upon opening. The box could be reused to hold paint brushes, pencils, another gift, or even the knife.
Design Concept and Solutions:
My goal was to create a package for the product that could do a better job of representing the product inside. I wanted to completely eradicate the use of plastic, make a package that created less of an impact on the environment and was beautiful for the user to look at as well as. The original package that was cardboard and plastic and I did not think that it matched the quality of the product inside, a Japanese pairing knife.
The purpose of the item inside is to be used as an everyday knife for cutting up vegetables and fruit. My goal was to create a package that reflected the rich culture and heritage of the country that it was made in. I wanted to wow the user and make something that they would be inclined to reuse and if not, know with certainty that they could recycle it.
I began by looking at Japanese knives, the beautiful simplicity to the hilt matched with the rich texture of the blade. So much beauty deserved something more. I remembered reading about Japanese joinery a while ago and after reading up about it again, the idea came to me that I should make a box for the blade and use no nails. It would be better for the environment and would reflect Japan.
I decided that I wanted my audience to be a culinary student or a professional in the industry. I wanted to create something that would give that person absolute joy to open. The idea was that I wanted the person opening it to have the same emotion a design student down when opening their MacBook packaging up for the first time. That feeling of excitement while opening up the layers of the box to reveal the item inside is what I wanted to promote.

Considerations:
Heritage - Japan has a very rich heritage and I wanted to make sure that the design was to that standard.
Environmental - The package should be simple but elegant, easily recycled.
Colour - Japan’s flag is a beautiful shade of red and the initial packaging makes attempts at that.
Typography - Japanese design loves geometrical sans-serifs.
Experience - This should be an exceptional experience for a culinary student.
Using these considerations, I applied myself to this redesign and my goal, which never changed during the entirety of this redesign.
I was planning to seal the box closed with a wax seal to give a sense of elegance. However, someone pointed out to me that this would leave a stain on the box. I also realized as I stood there with it in my hands, that a wax seal was too much, which is why I decided to wrap it in tracing paper instead. A great thing about the tracing paper is the auditory sensation of unwrapping it and the relation it has to actually receive a gift from someone. Suddenly, without me having to nudge anyone into thinking so, the package actually did look like a gift while keeping the box below visible.
I also considered placing a seal anyway on the paper wrap but decided I loved the simple elegance of the wrap alone. Sometimes, even if you think you have a concrete plan, when it comes to the creation side they fall to the wayside. That is why creating a prototype is so important.
Initially, I also had lofty plans for painting a beautiful scene on the lid of the box. However, during our feedback week, I had a lot of the students tell me that they loved how simple the box was, that the concept even reminded them of home. One of the girls told me that she was studying in Canada because she wanted to buy and sell products and she would definitely want to sell my product in Japan!
I was pretty attached to the idea of painting, but you learn a lot in design as you go through and build products, that sometimes it’s best to kill your darlings. Getting attached to one concept is a bad idea.
I found instead that I could create a colour pop by taking the wine red from the Japanese flag on the paper wrap and matching it to a fabric, which I then sewed into a handkerchief with the help of my mother and sister. I proudly did the inside seam and ironed it, but when the time came to sew the top, my sister, with her costuming diploma, stepped in for me.
The end result is a beautiful, simple yet elegant gift. When opening, the user has to first slide off the paper wrap, open the tracing paper, slide back the lid and then finally unfold the handkerchief to reveal the blade inside, safely nestled within the fabric to keep it from moving while in transit.
Day Seven - Blog Post #8

Today we had our prototypes ready for other students to look at and discover. I got some really cool information and feedback about my package just by watching my students pick my package up and open it. The reaction I received from the students who looked at my package was exactly what I’d hoped for. It helped though that the class that came in was made up of international students, many of those being from Japan. I had two Japanese students and a student from China who had been to Japan many times look at my package.
They were delighted with it and told me that the package was really similar to what you would actually see on the shelf in Japan to hold a good knife. They told me that the packaging style felt expensive and luxurious. I also got many good tips on how to make it even more authentic, such as possibly carving a pattern, making sure to give it a smooth finish and adding the Sun from the Japanese flag to directly behind the brand name on the paper slip.
Watching students interact and open my package made me really excited to work on my package further. It was great to see people’s reaction as they opened the box. No one had trouble opening it and they also told me that they liked how simple it was. They also told me that they would definitely keep the box and use it to hold other items or even just display it in their home.
I have a lot of work ahead of me, but I am excited to keep going.
Day 6 - Blog Post #7

Today, I brought in a sketch model and half of a mock-up. In class, I made the paper wrap-around for the box and made an insert for the inside to hold the knife in place.
The lid will slide off of the package and I will seal it closed with a wax seal. This is to create an experience for my audience as well as make something truly beautiful.
I really want the box to match the simple beauty of the knife, so what we’ve ended up with, is a fairly simply made box that will be joined together with wood glue and no nails to keep it in the Japanese style of wood joinery. I’ve also managed to find someone to help me make the box, which is excellent. We are using a nice, light spruce to create the box as that is what i could handle in my budget.
The plan is to paint the lid with a beautiful Japanese illustration, a big feat. Everyone knows that I’m not an artist but I also know that if I put my mind to it, I can do it.
After some consideration with Nancy, I’ve decided on using wax paper for the informational insert that will go inside. This is to further the experience of the user. I just need to find out where to get it printed!
I also started my digital file today. The only things that will truly be made on the computer are the paper wrap-around and the insert. Everything else will be made by hand.
My take away from this week is that sometimes I just need to get my hands going! I really had trouble starting this week for some reason, but once I got going, I got super into what I was doing. I enjoyed the simple happiness of creating.

Day Four - Blog Post #5

Today was the end of activity two!
Although I’m not 100% happy with my outcome, I’m proud of the work I’ve done. I learned a lot about packaging through this activity. The biggest thing was having the proper measurements to work with and having the original package and mock-up made by my partner to show me what was important.
Every little thing about a package has to be considered. For example, my package had little cut-outs on the bottom flap, and a cut-out on the top flap to make it easier to open. Two of my folded in flaps were also shorter than the other two by a mere millimetre! It was cool to understand this and figure out the best way to adjust for this.
My takeaway from this project is that it’s important to look at the small stuff and to sweat it when it comes to designing a package!
Day Three - Blog Post #4
Today was fun! We took our digital work and printed them out to see how the type and colour looked and to make sure that we had our sizing right.

I had a heck of a time with it and needed to print my package out three times! The first time I did it, I accidentally cut a flap that was meant to be a fold. The second time I printed, I ripped my paper when trying to use the bone tool on it. For my third attempt, I realized that patience was key so when I glued the design onto the bristol, I pressed firmly and then waited for a few minutes before trying to use the bone tool on it. I also made sure that I had a fresh blade in before I tried to cut out my package.
I was happy to see that my colours worked perfectly! I used the pantone book last week to choose them but I was worried that they wouldn’t be quite right. Working with the gradient has been a bit of a chore but also fun! Getting it just right will be tricky so I really need to spend some time on that.
Now I just need to make sure that I have my type set perfectly before I send my package off to print!
Day Two - Blog Post #3

Today we swapped the packages we’d worked on this past week and our assignment was to recreate the new package but digitally! My new package is fun because each text block has a gradient colour scheme. After getting a close to accurate digital outline, I made sure to grab the correct swatches for the gradient from the Pantene swatch books that my professor provided in class.
I’m lucky that I’ve had quite a bit of practice with the pen tool this past summer or I may have found this a bit more frustrating. At this point, I think that illustrator is my favourite program to work in. I still need to get on buying some replacement blades for next week to ensure a good cut. I really want to make sure I get this package as accurate as possible so I’ve scanned the package itself to double check my work.
Reflection: Taking this tactile work back to digital adds a fluidity from hands-on to computer work, something that I’ve always appreciated about design work.